自定义starter
1、starter启动原理
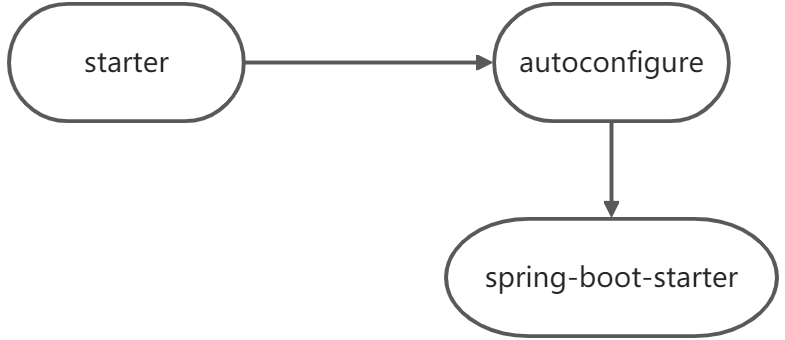
- starter-pom引入 autoconfigurer 包
然后,引入starter — xxxAutoConfiguration — 容器中放入组件 —- 绑定xxxProperties —- 配置项
自定义starter
首先需要准备好两个项目
空工程:
hello-spring-boot-starter(启动器)
空SpringBoot工程
hello-spring-boot-starter-autoconfigure(自动配置包)
其中自动配置包里面有:
1
2
3
4
5
6
7
8
9
10
11
12
13
14
15
16
17
18
19
20
21
22
23
24
25
26
|
import org.springframework.boot.context.properties.ConfigurationProperties;

@ConfigurationProperties("hello")
public class HelloProperties {

    private String prefix;
    private String suffix;

    public String getPrefix() {
        return prefix;
    }

    public void setPrefix(String prefix) {
        this.prefix = prefix;
    }

    public String getSuffix() {
        return suffix;
    }

    public void setSuffix(String suffix) {
        this.suffix = suffix;
    }
}
|
1
2
3
4
5
6
7
8
9
10
11
12
|
public class HelloService {
@Autowired
HelloProperties helloProperties;
public String sayHello(String userName){
return helloProperties.getPrefix() + ":"+userName+"》"+helloProperties.getSuffix();
}
}
|
这里没有加入组件,没有任何注解
然后再写一个自动配置的类:
1
2
3
4
5
6
7
8
9
10
11
12
13
| @Configuration
@EnableConfigurationProperties(HelloProperties.class) //默认HelloProperties放在容器中
//@ConditionalOnMissingBean(HelloProperties.class)
public class HelloServiceAutoConfiguration{
@ConditionalOnMissingBean(HelloService.class)
@Bean
public HelloService helloService(){
HelloService helloService = new HelloService();
return helloService;
}
}
|
@ConditionalOnMissingBean(HelloProperties.class)是当容器中没有HelloProperties.class这个类的时候,这个类才会生效,起到防止覆盖的作用。
@EnableConfigurationProperties(HelloProperties.class)的作用是自动配置我们的hello组件
这个配置主要的作用就是将其保存入我们的组件
使用启动器
之后便是使用启动器,先配置xml,然后使用maven的clean和install进打入我们的本地仓库当中
1
2
3
4
5
6
7
| <dependencies>
<dependency>
<groupId>com.my</groupId>
<artifactId>hello-spring-boot-starter-autoconfigure</artifactId>
<version>0.0.1-SNAPSHOT</version>
</dependency>
</dependencies>
|
测试
然后再创建一个测试的springboot组件:
引入依赖
1
2
3
4
5
| <dependency>
<groupId>com.my</groupId>
<artifactId>hello-spring-boot-starter</artifactId>
<version>1.0-SNAPSHOT</version>
</dependency>
|
就会引入这个自定义。但是发现不能像spring引入其他依赖一样,被自动注入生效
然后,在autoconfigure包中配置引用 META-INF/spring.factories
1
2
3
| # Auto Configure
org.springframework.boot.autoconfigure.EnableAutoConfiguration=\
com.atguigu.hello.auto.HelloServiceAutoConfiguration
|
然后再重新打包clean 和install
结果
我们在新项目中写一个controller:
1
2
3
4
5
6
7
8
9
10
11
12
13
| @RestController
public class HelloController {
@Autowired
HelloService helloService;
@GetMapping("/hello")
public String sayHello(){
String s = helloService.sayHello("张三");
return s;
}
}
|
发现自动注入成功了,
但是我们的helloservice是有前后缀的,如果需要使用,则需要在配置文件当中写入:
1
2
| hello.prefix=my
hello.suffix=88888
|
接着再继续测试,发现输出结果正好是:
.
.
.
.